
A Fabric Foundation Piecing Tutorial
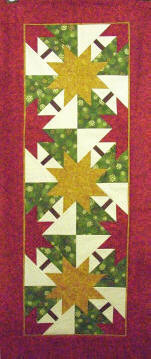
Foundation piecing is the technique of sewing fabric to a foundation in order to achieve very precise results. The foundation can be fabric and left in place, or it can be paper to be removed later. Paper pieced patterns are usually small and give you the opportunity to use up your small scraps leftover from other projects. Patterns pieced to a fabric foundation are usually a bit larger and easier to use. A fabric foundation pieced block is a good way to learn the technique. The 55″ x 23″ table runner to the right was made by Tamara using Foundation by the Yard.
Fabric Colors refer to our sample. Use your own colors! WOF means Width of Fabric and HST refers to a Half Square Triangle (or a 45-degree triangle.) If you are unfamiliar with foundation piecing, read through all these directions first before attempting to follow along.
Fabric Requirements
• 1/2 yd white for the background
• 1/2 yd green for trees
• 1/2 yd gold for stars and optional flange
• 1 yd red for borders
• 1 1/8″ x WOF brown strip for tree trunk (no stripes, checks or plaids)
• 1 panel Hunter Star Foundation by the Yard.
You will also need:
• A small mat and
• 18mm or 28mm rotary cutter
• short ruler with 1/4″ marks or add-a-quarter ruler
• small scissors
• flower head pins
Cutting:
- Background. Cut (2) strips 3 ½” wide by the WOF. Cut (1) strip 7″ wide by the WOF. Cut this strip into (6) 7″x 7″ squares. Cut these squares once on the diagonal to make (12) Half Square Triangles (HSTs).
- Green for trees. Cut (1) strip 7″ wide by the WOF. Cut this strip into (6) 7″x 7″ squares. Cut these squares once on the diagonal to make (12) triangles. Cut (1) strip 6″ wide by the WOF. Cut this strip into (12) 6″ x 3″ rectangles.
- Gold for stars and optional flange. Cut (2) strips 6″ wide by the WOF. Cut this strip into (24) 6″ x 3″ rectangles. Cut (4) strips 1″ wide by the WOF for the flange.
- Red for star and borders. Cut (2) strips 6″ wide by the WOF. Cut this strip into (24) 6″ x 3″ rectangles. Cut (4) strips 3 ½” wide by WOF.
- 1 1/8″ x WOF brown strip for tree trunk (no stripes, checks, or plaids)
- 1 panel Hunter Star Foundation by the Yard.
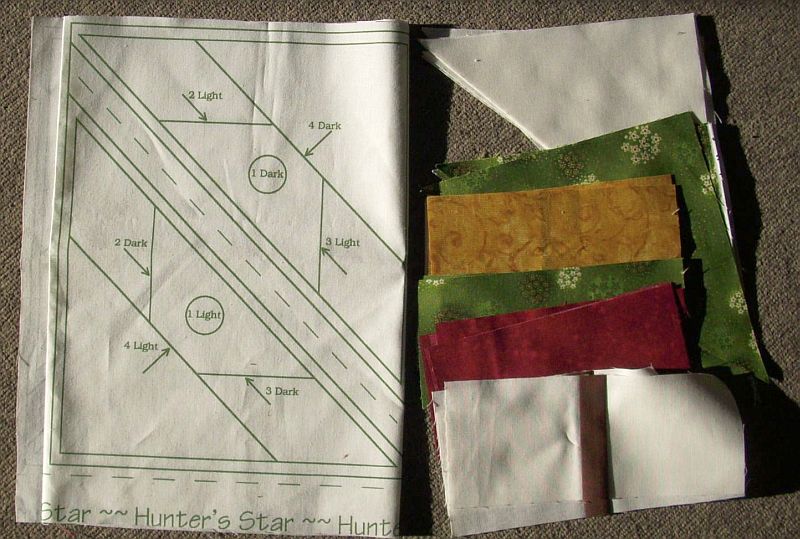
Preparing the Foundation by the Yard
Cut the Hunter Star Foundation by the Yard into rectangular sections but do not cut them apart on the diagonal. You will need 12 rectangular sections. Decide on what your center star color will be (in our sample, it is gold), and label all the Number 2 areas with that color using a light pencil. Ignore the fact that it says 2-dark and 2-light. All your Number 2 areas will be the same color. All your Number 3 areas will be the same color as each other, too. (In our sample, it is red.) Label all your Number 3 areas with your color choice again using a light pencil.
Your Number 4 areas *will* change color depending on if they are dark or light. Label your Number 4 light area with the background color and your Number 4 dark area with green (or your choice of color.)
All your Number 1 area darks will be the same color as the Number 4 area darks *but* all your Number 1 area lights will be the pieced tree trunk. Label your Number 1 area darks with their color and your Number 1 area lights with lines indicating the tree trunk. Don’t worry about making these lines too precise. They are only to remind you that the tree trunk goes there.
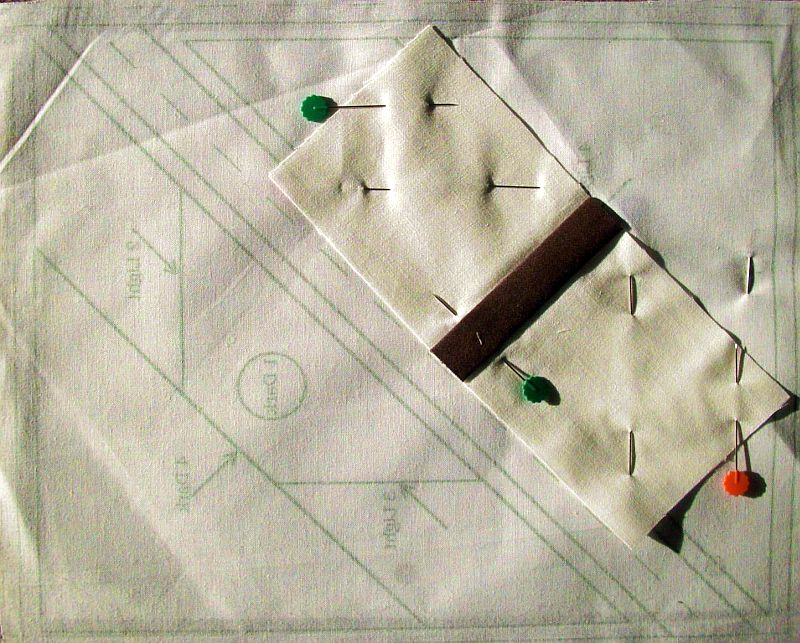
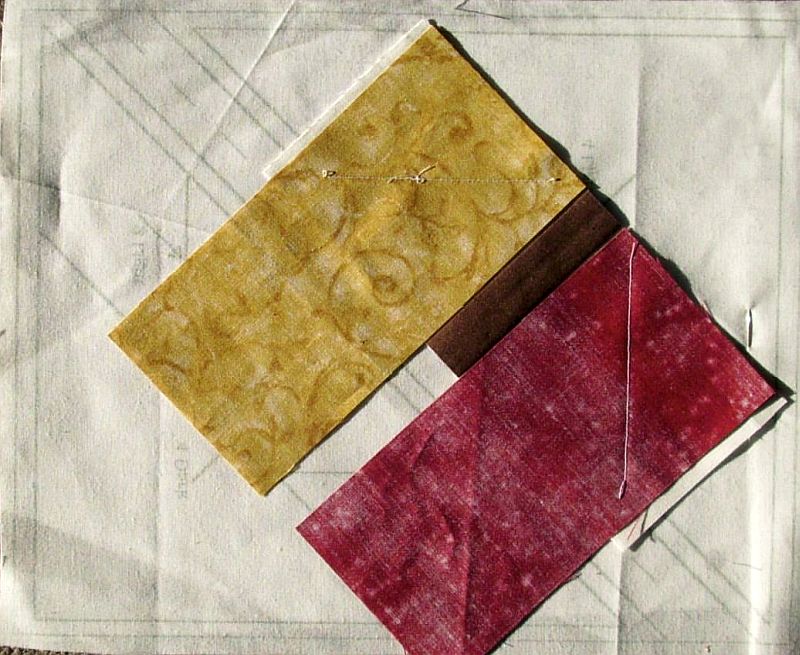
To prepare the tree trunk section, sew the 1 1/8″ brown strip between the (2) 3 ½” wide background color strips. Press to the dark tree trunk in the center. Cut this strip into (12) 3″ x 7 1/8″ rectangles as shown in the picture above.
Stack all your cut pieces into two groups, a light group, and a dark group. The tree trunks belong in the light group. This will make it easier for you to keep the colors in the right place on the blocks.
Sewing the dark group
Assemble: (remember, all colors refer to our sample. Use your own colors!)
• (12) green HSTs
• (12) green 3″ x 6″ rectangles
• (12) gold 3″ x 6″ rectangles
• (12) red 3″ x 6″ rectangles
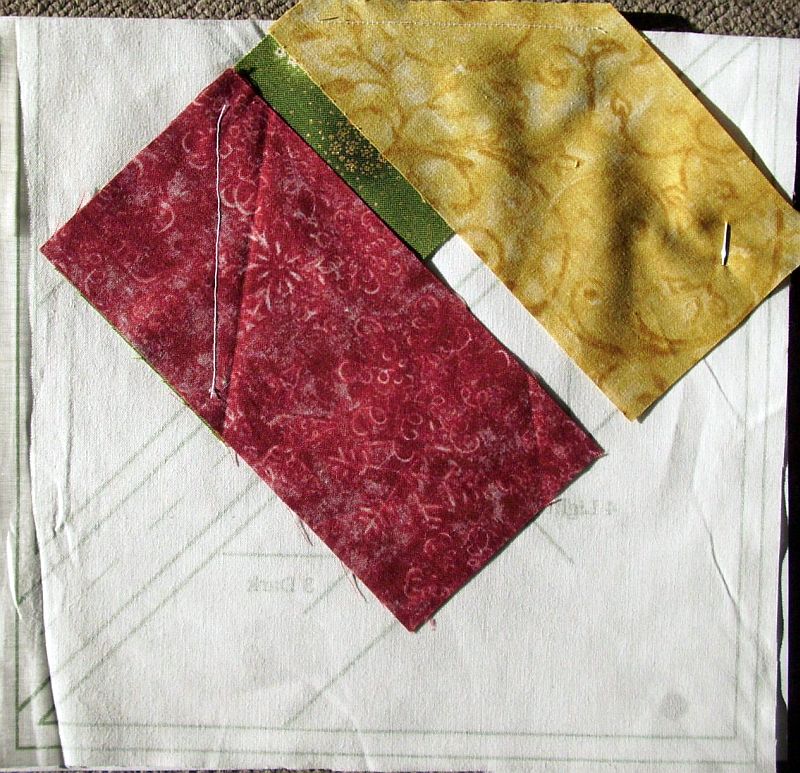
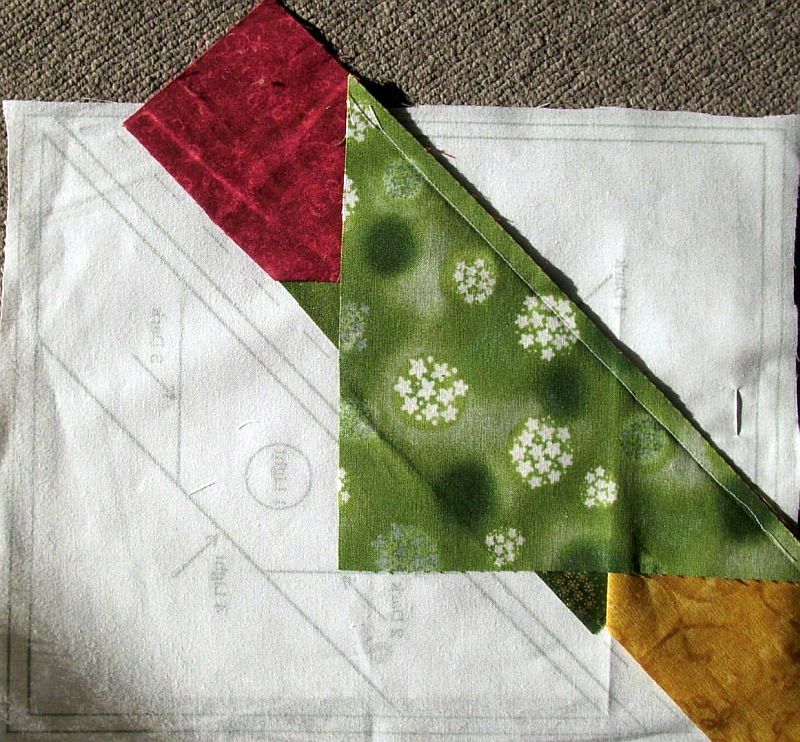
Hold the front of the Foundation By The Yard (the part that has the printing) up to the light. While looking through the fabric, roughly center a green rectangle on Area 1 Dark, wrong sides together. It will be too big, but that is okay. Use your flower pins to pin through both layers. Check the block to make sure it is smooth.
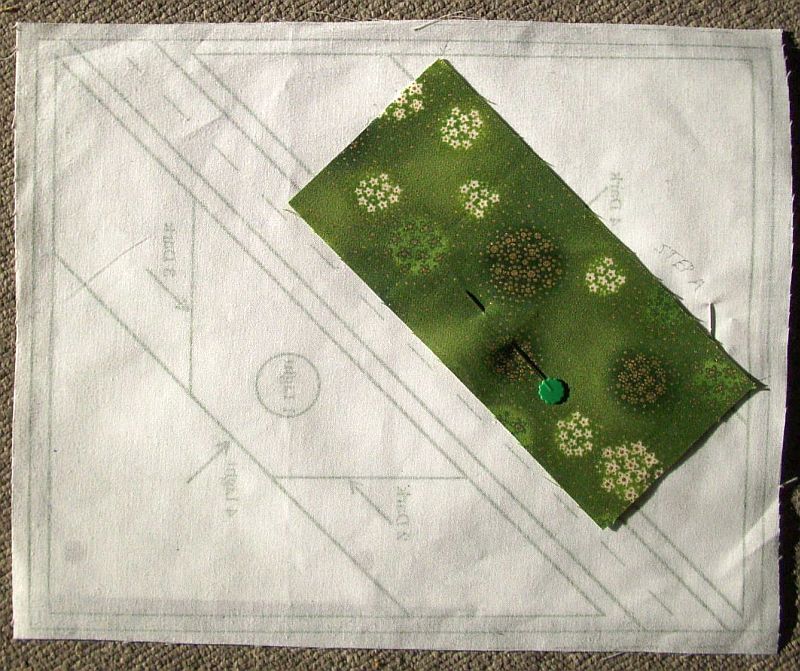
Place a flower pin at the beginning and end of the stitching line on the front of the Foundation by the Yard. Place them so you can remove them easily as you sew.
Turn over the foundation by the yard so the fabric is facing you. Place a red rectangle on the left side of the green one, with the long side hanging down. From other side (the printed side), put a pin through all layers on the sewing line that the 3-Light arrows are pointing to. Turn it over again and fold the red fabric up, pretending that the pinned sewn line has actually been sewn.
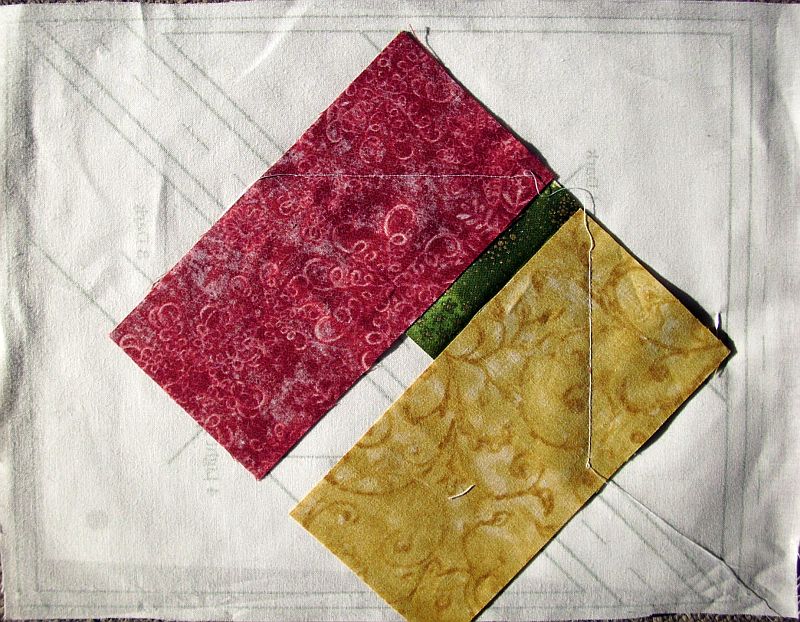
If you have placed everything correctly, you will have created what looks like a mitered join between two pieces of fabric. If that is the case, turn the fabric over again and sew the pinned line. Use a regular stitch length. Start and finish with a few extra stitches. Press.
Do the same thing for the gold rectangle on the right side of the green rectangle. Notice that you do NOT get a point in the center. That’s okay.
Do the 11 remaining dark blocks. It’s not necessary to do all the reds and then do all the golds – you can save time and thread by sewing up one color, moving over, and sewing down the second color on each individual block. Cut the thread between rectangles. Remove all pins.
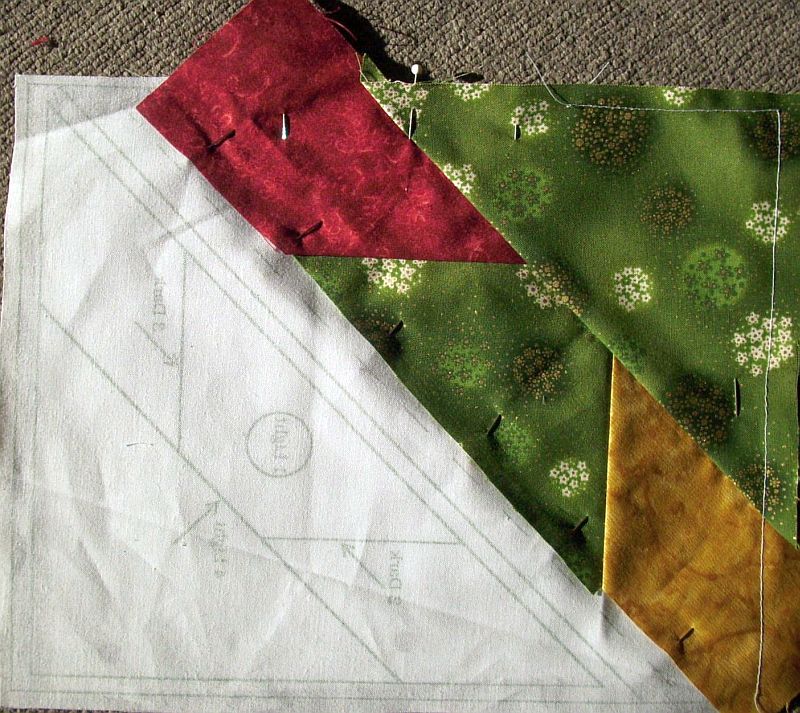
Trimming the Seams
Place the foundation with the fabric right side up on your cutting board. Fold the Foundation by the Yard under the fabric along the seam line you just stitched. Place your ruler so that the 1/4″ mark is along the edge of the fabric. Trim off the triangle corner. If you have done it right, you have just cut off the excess fabric so you now have a 1/4″ seam allowance for that seam. Be careful not to cut the fabric!
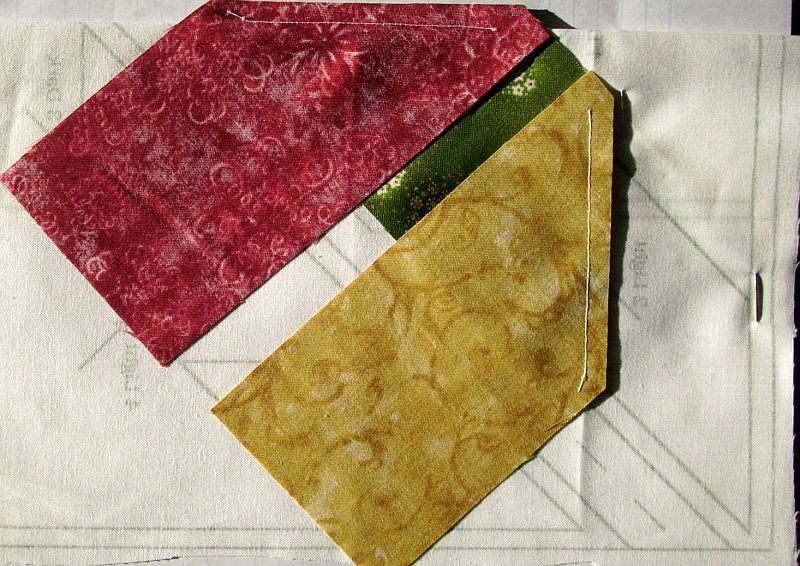
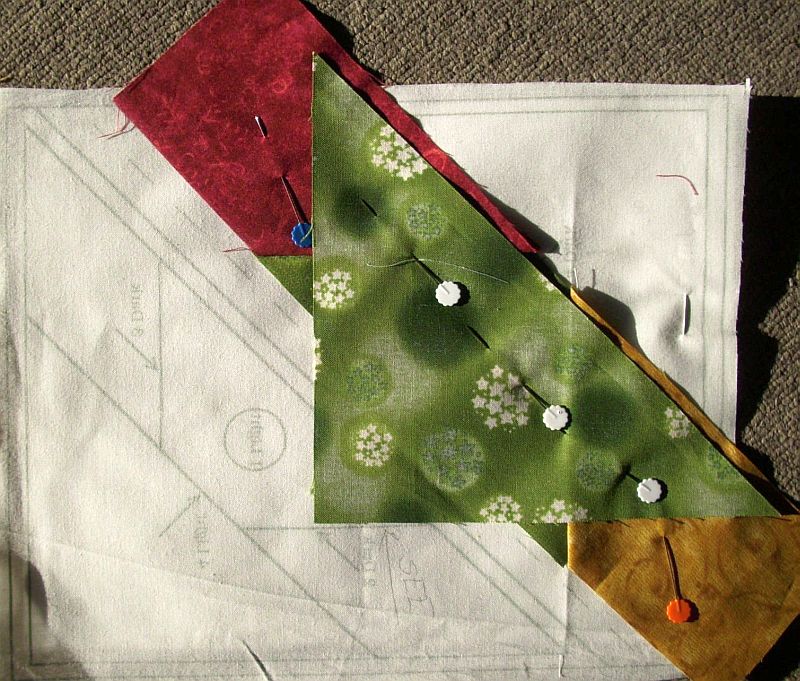
Finger press the fabric up. If everything looks good (see the picture below), repeat this process for all the seams. Before cutting any fabric, always double-check to make sure you aren’t cutting the wrong thing! From the right side, press all your rectangles into place and pin.
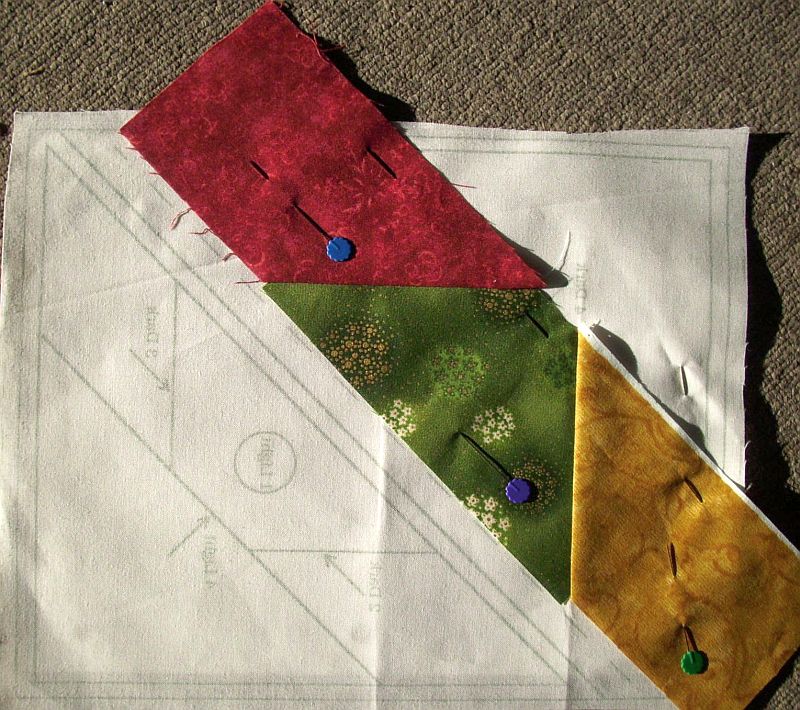
Adding the Next Piece
Using a flower pin, mark the exact beginning and end of the #4 Dark Stitching line. Use these pins to help you position the green HST on the foundation fabric. Pin the stitching line, then flip the fabric up. Does it cover the edge of the block? If so, change the position of the pins and sew from the printed side of the Foundation by the yard. Trim the seams to 1/4″. Turn the block over, press the piece you just sewed and pin it in place. Stay stitch the edge if you prefer. Repeat for all the remaining dark blocks.
Sewing the Light Group
This is the side that has the tree trunk in the middle. Just as you did with the dark blocks, roughly center the tree trunk rectangle in the center of the Number 1 Light area. Pin it in place. Pin a gold rectangle to the left side of the tree trunk rectangle and a red rectangle to the right side. Working from the printed side of the Foundation by the Yard block, sew seams 2-dark and 3-dark.
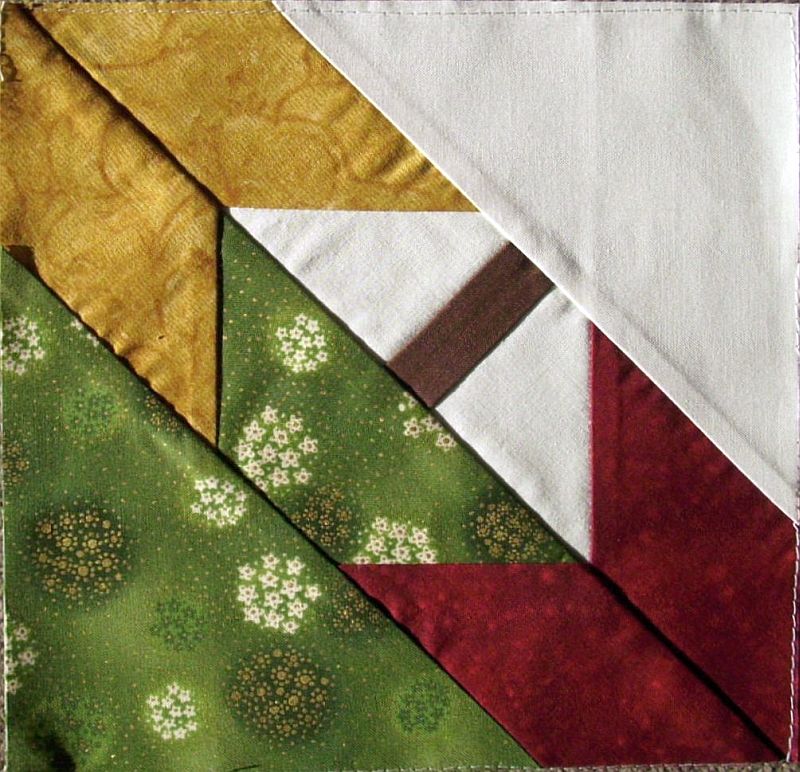
Check it from the right side of the block. If all has gone well, you can continue sewing this block the same way you did for the dark block. Don’t forget to use a background HST at the tip! Once all your block pieces are sewn, you can cut apart the rectangles and sew them back together again to create the block below. Press the seams between the dark side and the light side open. Make 12 blocks like this one. Square them up to 8 ½” if necessary.
Finishing the top
Lay your blocks on the table and decide on how you would like to place the stars. Our sample has the gold in the middle, but maybe you would rather have the red? It’s YOUR quilt, make it the way you want it.
Once you have decided on a layout, sew your blocks in six rows of two each. Press. Measure your quilt through the center horizontally. Cut two of your 1″ flange strips to this length. Stay-stitch them in place by sewing them to the top and bottom of your quilt top using a 1/8″ seam. They may be a tiny bit too big or a tiny bit too small. This is okay. Just ease them in. By measuring through the center and cutting strips to that length, you are forcing your quilt to be square.
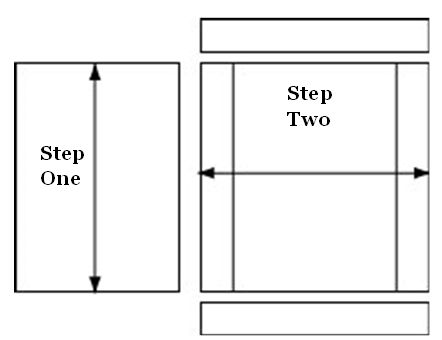
Now measure your quilt through the center vertically. Cut two of your 1″ flange strips to this length and stay stitch them in place, using a 1/8″ seam. Sew them to the sides of your quilt top. Again, they may be a tiny bit too big or a tiny bit too small. It’s still okay. Just ease them in.
Repeat this process with the 3 ½ ” border print strips. This time when you sew them in, use a regular 1/4″ seam. Do NOT just add a strip of fabric and sew until you are done! That is a sure recipe for wavy borders.
You are done! Isn’t it wonderful? Hang it on the wall for a while so you can enjoy it and your family can praise you. Now batt, baste and put it on your table.
Have another tip to offer? Send it to me or reply below and I will add it here.
Don’t forget to sign up for the newsletter! Once a week, I send updates on quilt-related information I have found while wandering the web. This might be an inspiring article, a tip or tutorial I have discovered (or written), and occasionally exclusive offers & discounts as well as immediate access to the secret page of free patterns, guides, and printables. You can follow my page on Facebook, or join the Make Believe Quilters group, too.

Where is the pattern for the hunter star