*This post MAY contain affiliate links. That means that if you make a purchase after clicking on a link I may earn a small commission at no extra cost to you. I don’t ever recommend something that I don’t use myself. Not all links are affiliate links. For more information, see our Privacy Policy.
How to use Bubble Jet Set to treat fabric for photos
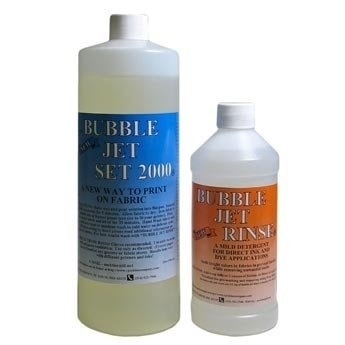
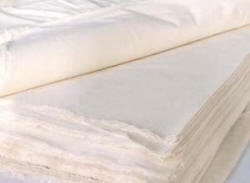
Making your own Photo Transfer fabric for use in an inkjet printer is time-consuming but more economical than commercially prepared sheets if you are doing a large amount. One bottle of Bubble Jet Set and Bubble Jet Rinse will prepare 40 – 60 fabric sheets for printing. Use quality fabric (choose 200 thread count Pima cotton or PFD muslin) adhered to a stabilizing foundation so it won’t jam in your printer.
We recommend Epson inkjet printers, which use archival ink. Most Hewlett-Packard inkjet printers will work, but be aware that HP has currently released some new printers which can only achieve a 50% permanency rate. This new ink is placed in cartridges no. 10 and 11. If your printer uses cartridges 10 or 11, use a different printer for printing on fabric. For more information on choosing a printer, read this article by the CJenkins Company.
The BJS method of printing photos on fabric should not be used if you think the resulting fabric might be ingested – i.e. chewed on by a baby. It *is* a chemical after all.
General Instructions for using BJS 2000:
- Do not use these instructions to prepare fabric for Inklingo. If you are using Inklingo, you WANT the ink to wash out.
- Cut your fabric slightly larger than the size you will be printing. (i.e. for 8½ x 11 cut your sheets 9″ x 10½” or larger). This allows for shrinkage. Read Stabilizing Your Fabric below.
- Soak a whole pile of fabric sheets at the same time. Lay one sheet in the bottom of a flat plastic box and pour a little BJS on top. Wearing gloves, rub the liquid into the fabric until it is thoroughly soaked. Put a second sheet on top of the first, and it will soak up the excess liquid from the first sheet. Pour a little more BJS on the second sheet and rub it in. Continue until you have soaked all your fabric. Hang dry the fabric, or spread the fabric to dry on a table top covered with plastic. Do not leave the sheets touching each other – they may stick. Let it air dry for 48 hours. Pour any leftover BJS back into the bottle.
- Iron the fabric to a stabilizer (see below) until it is completely bonded with no air bubbles between the fabric and freezer paper. Cut it to fit your printer with a sharp rotary cutter. Trim any loose threads.
- Using the advanced or custom options of your printer properties, change the print settings to to the “finest DPI” (720×1440), the media type setting to “photo quality glossy paper” and the color adjustment to “vivid”. (Do not use the photo ink, which is meant for paper. Use regular ink, or the new HP Vivera ink if you have an HP.) Set your printer to accept heavy paper and for manual feed. Feed the sheets one at a time. Don’t forget to change these settings back when you are done!
- Run it through your ink jet printer and let sit for 30 minutes. Machine wash (delicate cycle) in warm water with Bubble Jet Rinse. Do not let the fabric fold in on itself or twist during the wash. It may adhere to itself. Do not heat set with an iron – it is the wash which sets the print. Bubble Jet Rinse removes the excess dye and sets the existing dye so your quilt can be safely washed in the future.
- See Printing on Fabric for more helpful tips.
Stabilizing Your Fabric
There are several ways to stabilize your fabric in step 3.
Freezer Paper
You could iron it to the shiny side of a piece of freezer paper. Use a hot (1200 watt) iron on the hardest surface you can find. A cutting board works well.
Freezer paper is that wonderful stuff you can find in your grocer’s storage aisle or at a butcher shop. One side is paper and the other has a light coating of wax which melts when you iron it. It does tend to curl, so try to cut it into 8 ½” x 11 ½” sheets ahead of time. Flatten them under your cutting board for a few days, or press them to a pressing sheet. Pay extra attention to the side that is going through the printer first – you want that side to solidly adhere to the freezer paper. Be sure to remove any stray lint, strings, or threads.
Palette Paper
Instead of freezer paper, you could use Palette paper, available from your local art supply store, NASCO Art Supplies, or Dick Blick’s art supplies site. Choose Canson, Bienfang or Strathmore Paper Palette palette papers. ProArt Acrylic Media Palette is made differently and won’t work for this project. Avery 8 ½” x 11 labels work too, if you can get the fabric to stick without bubbles. It stays sticky through up to 10 applications.
Fabric Stabilizers
Lite Heat n Bond is a paper-backed sheet of solid lightweight heat-activated adhesive. You iron it onto the back of your fabric, then pull the paper off to create iron-on motifs. To use this for printing on fabric, don’t pull the paper off. Trim to the paper size and use in your inkjet printer to create labels or other items to be ironed on to garments or quilts. Avery offers free Design software that you can download and use to create labels.
Roll with a lint roller, or check carefully for threads that would mar the printed surface. Print the HNB-backed fabric in your inkjet printer. The paper backing acts like freezer paper — but stabilizes it better. The best thing about using this product is that, after printing, you can cut out the label and iron it on — then stitch around the outside edges for additional stability. Order Lite Heat n Bond here.
Retayne and Synthropol
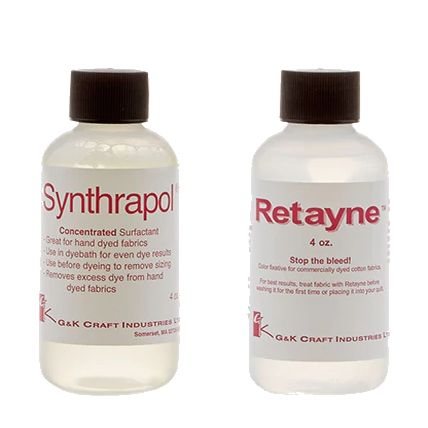
If you have a problem with fabric bleeding, you may need either Synthrapol or Retayne. No, vinegar doesn’t work. It used to, but dye formulations have changed. What vinegar does do well is cut soap scum. If your little black dress is now a little gray dress, try washing it with vinegar. That may remove the soap deposits that you can’t see to restore the vibrancy of the fabric.
Color Catchers are helpful but to truly remove excess dye molecules, you need to use a chemical.
Synthrapol is used to suspend and carry excess dye from the fiber. It removes any unfixed or unreacted dye to keep it from redepositing dye onto areas of the fabric that you don’t want to be stained. It is recommended for use as a pre-wash to remove excess dye (especially in reds and blues), sizing, dirt, and oils.
Retayne is used to set the dye. For example, if you printed a text message on fabric, you can use Retayne to to set it. If you have a piece of fabric you know will fade, you can use Retayne to keep fading to a minimum.
See Printing on Fabric for tips on actually using photo-printed fabric.
Have another tip to offer? Send it to me or reply below and I will add it here.
Don’t forget to sign up for the newsletter! Once a week, I send updates on quilt-related information I have found while wandering the web. This might be an inspiring article, a tip or tutorial I have discovered (or written), and occasionally exclusive offers & discounts as well as immediate access to the secret page of free patterns, guides, and printables. You can follow my page on Facebook, or join the Make Believe Quilters group, too.
