*This post MAY contain affiliate links. That means that if you make a purchase after clicking on a link I may earn a small commission at no extra cost to you. I don’t ever recommend something that I don’t use myself. Not all links are affiliate links. For more information, see our Privacy Policy.
Quilt Applique Tips and Techniques
This is an overview of the various methods of applique, such as needle-turn, fusible, freezer-paper, and more.
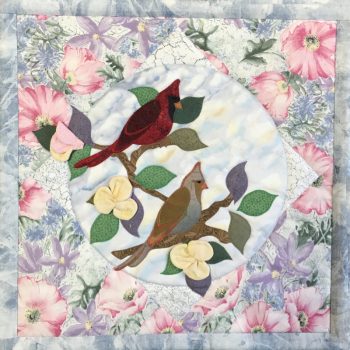
Needle turn Quilt Applique
- Lightly trace the motif on the back of your fabric using a mechanical pencil or a disappearing ink pen. Remember it will be reversed when you cut it out. Cut out your motif including a scant seam allowance. Draw the placement diagram lightly to your base fabric in pencil, then baste the motif in place with thread or tiny pins. Turn under the edge with a moist toothpick as you appliqué making sure to cover the placement lines. It helps to crease the seam allowance with your thumb before laying the motif on your fabric.
- Cut out your motif using a scant seam allowance. Run a basting stitch along the edges of the motif. Pull the thread slightly and the appliqué piece will cup the seam allowance in to the wrong side. Pin the motif to the front of the block along your placement diagram and appliqué outside the basting thread. Pull the basting thread just before you finish, or leave it in place.
- Instead of using a basting stitch (above) try using liquid starch. Just wet a quilt tip with it, wet the area to be turned under and fold over the seams. It will hold the fold in place while you work, but it must be rinsed out when you are done quilting the quilt.
- Consider using a Glue Stick to hold your motif in place while you hand appliqué it to your piece. Fusible thread can be used as well. (This is a great thread to have on hand for machine binding, too. See the article on binding for more information.)
- Water Soluble thread is the perfect answer for machine and hand basting. When you have finished quilting, just wash and your basting stitches dissolve away.
- Use a washout-embroidery stabilizer such as Sulky Solvy Lightweight Water Soluble Stabilizer. With this method, cut out your appliqué piece and a matching piece of Solvy. Place them right sides together and sew around the outside using a very small stitch. Clip your curves. Cut a small hole on the Solvy and turn the piece inside out. Press. Appliqué the piece to your background. When you are done, wash the patch and the water soluble stabilizer will dissolve.
- Use quality appliqué needles. Like quilting needles, they will bend and adjust to your style. John James #10 needle is a good brand.
- Here is a video on blind stitching
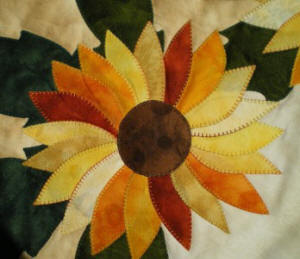
Freezer Paper Quilt Appliqué
- Cut your freezer paper to the size of the appliqué. Iron it on to the front of your motif fabric and cut generously around it. Pin the combination to the front of the block, then needle turn the edges under as you stitch, using the freezer paper as an edge guide.
- Cut your freezer paper to the size of the appliqué. Iron it on the back of your motif fabric and cut generously around it. Baste the seam allowance in to the wrong side. Pin the combination to the front of your block. Appliqué, being careful not to catch the freezer paper in your stitches. Just before you finish, pull the freezer paper out with a pair of tweezers
- Here is a video on freezer paper applique
Fusibles
Just learning fusible applique? Be sure to read Applique using Fusible Web for some tips and techniques to make this quick method a bit easier. Lots of inspirational pictures!
- On the paper side of your fusible web (such as Steam-a-Seam), trace your appliqué design. The fusible goes on the back of your motif (the wrong side of the fabric) so the traced image has to be reversed to match the pattern. Rough cut these shapes out. Then lay the web on the WRONG side of the fabric and iron according to the manufacturers instructions. Now you can cut out the shape on the traced lines. Remove the paper from the back of the motif and place it fused side down on your quilt block. Fuse it in place according to the manufacturers directions.
- If your motif is very large, you might want to remove the center before ironing the fusible to the back of the motif.
- You don’t need to finish the edges of your appliqué. If you would like to, a satin stitch covers the edges completely. You can change the look of the piece by using using contrasting or specialty thread. You may also use a buttonhole/blanket stitch as well as a tight zigzag with invisible thread instead of satin stitch, but it won’t cover the edge completely.
- An alternative method is to place the rough side of the interfacing against the right side of the fabric, stitch around your appliqué, cut a slit through the interfacing only, and turn the appliqué right side out. This causes the edges to be finished, and the fusible side of the interfacing (the right side of your fabric as well) to be on the outside of your shape. Fuse this to your background, then zigzag (or buttonhole stitch, use one of those cute fancy stitches on some machines, or even hand stitch) the appliqué to your background. (Thanks, Emilynn!)
- Here is a video on fusible applique
Other Methods of Quilt Applique
- Cut out your appliqué motifs using templates and adding a scant seam allowance. Draw the placing diagram on the wrong side of your base fabric lightly in pencil. On the right side of your fabric, baste your appliqué piece along the placement diagram lines Use doubled thread and take small stitches. Needle turn appliqué, then remove the basting stitches.
- For larger appliqué pieces: Cut out two appliqué motifs using templates and adding a seam allowance. Sew them right sides together, leaving a space to turn them inside out. Press, rolling the seam to the inside. Appliqué, using a dab of washable glue to hold it in place.
- Embroidery. Hold the edges down with satin stitching or, for a 30’s look, ladder stitching. To avoid fraying or breaking your thread, do not pull your stitches through with the needle. Grasp the thread just behind the needle and pull. It also helps to work with a short thread and start with a new thread when starting a new appliqué. If you use a metal thimble, take care to note if you are accidentally trapping the thread between the needle and thimble. Mettler 60 wt. cotton is good for hand embroidery as well as 50 wt DMC cotton, with a John James #10 needle.
- A great place to find applique motifs is in a coloring book.
Have another tip to offer? Send it to me or reply below and I will add it here.
Don’t forget to sign up for the newsletter! Once a week, I send updates on quilt-related information I have found while wandering the web. This might be an inspiring article, a tip or tutorial I have discovered (or written), and occasionally exclusive offers & discounts as well as immediate access to the secret page of free patterns, guides, and printables. You can follow my page on Facebook, or join the Make Believe Quilters group, too.
